Fork and Clone
Learning Competencies
By the end of this exploration, you should be able to:
- Fork a repository
- Clone a forked repository
Summary
You will use this deep-dive exploration to create your forked version of a repo. You will then clone a copy to your machine. This clone is where you will be working on reflections for the rest of your learning exploration and assessments throughout Foundations. By creating a forked version, your changes will not show on the main Dev Academy version.
"A fork is a copy of a repository. Forking a repository allows you to freely experiment with changes without affecting the original project. Most commonly, forks are used to either propose changes to someone else's project or to use someone else's project as a starting point for your own idea." Practice Forking GitHub Help
Time Box
| Activity | Time |
|---|---|
| Explore | 45 minutes |
| Fork, Clone | 1-2 hours |
| Reflect | 15 minutes |
Follow the timebox suggestions. If you get stuck, take a quick break and return to it. Reach out to the community on Discord. Let the learning competencies be your guide.
Forking Workflow
Excerpt from AtlassianThe Forking Workflow is fundamentally different from other popular Git workflows. Instead of using a single server-side repository to act as the “central” codebase, it gives every developer their own server-side repository. Each contributor has two Git repositories: a private local one and a public server-side one. The Forking Workflow is most often seen in public open-source projects.
The main advantage of the Forking Workflow is that contributions can be integrated without the need for everybody to push to a single central repository. Developers push to their own server-side repositories, and only the project maintainer can push to the official repository. This allows the maintainer to accept commits from any developer without giving them write access to the official codebase.
The Forking Workflow typically follows a branching model based on the Gitflow Workflow. This means that complete feature branches will be purposed to merge into the original project maintainer's repository. The result is a distributed workflow that allows large, organic teams (including untrusted third parties) to collaborate securely and flexibly. This also makes it an ideal workflow for open source projects.
Explore Forking
Use the timebox suggestions and explore Forking.
Suggested Resources:
Step 1: Fork
Navigate to the reflections repo in the foundations org.
Create your own version of this repo by clicking the Fork button (top right) and follow the process. Below is an example of this process using the Foundations repo.
Origin: https://github.com/dev-academy-foundations/reflections
Destination: https://github.com/YOUR-GITHUB-USERNAME/reflections
Figure 1: Fork Repo from origin

Figure 2: View of Forked repo in destination

Step 2: Cloning
Your forked copy of the repository now exists on GitHub, but to add or edit files using your text editor, you need it to exist on your computer (i.e. you need to clone it locally).
Figure 3: Clone button
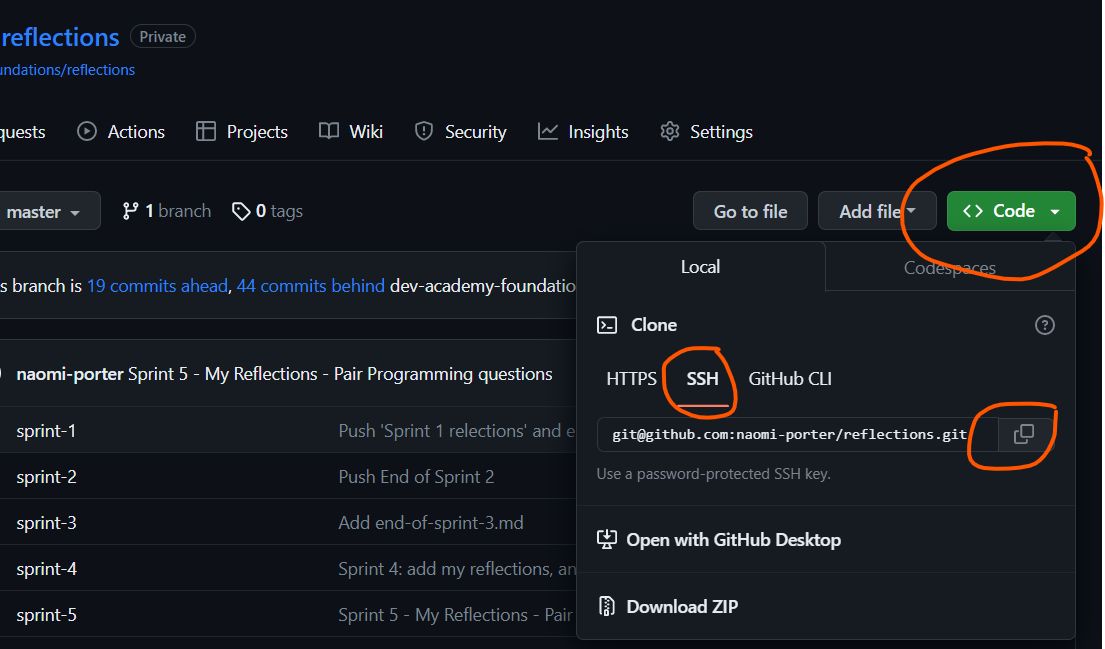
- In your forked repo (i.e.
https://github.com/YOUR-GITHUB-USERNAME/reflections), click on<> Codeand copy the SSH URL (Figure 3). - In your terminal, navigate in to your
dev-academyfolder. - Enter the command
git cloneand use the keyboard shortcutcmd v(mac) orctrl v(win) to paste.
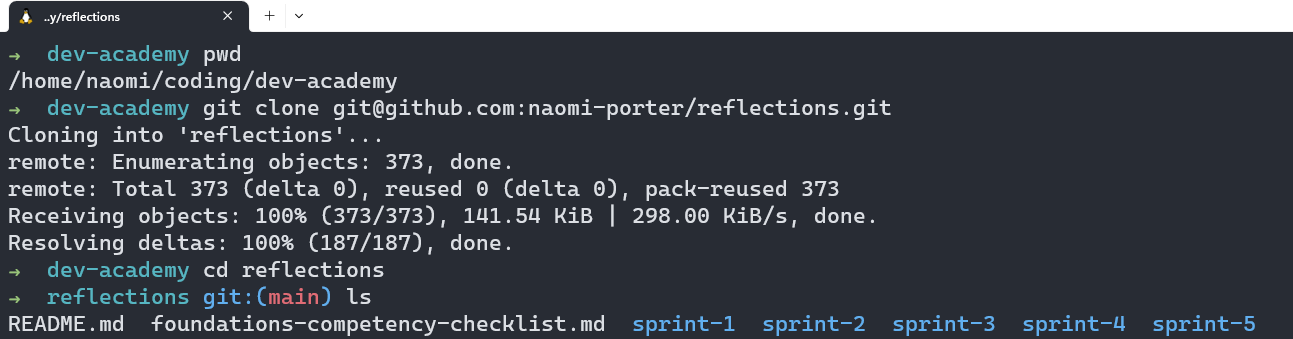
Figure 4: Terminal commands for cloning
Step 3: Open in Visual Studio Code
Visual Studio Code is a text editor you installed during the initial setup. You may have also dabbled in other text editors like 'Atom' or 'Sublime Text', but our editor of choice is Visual Studio (VS) Code for this course.
- In your terminal, navigate into your
reflectionsfolder. - Enter the command
code .which will open up thereflectionsfolder in VS Code.
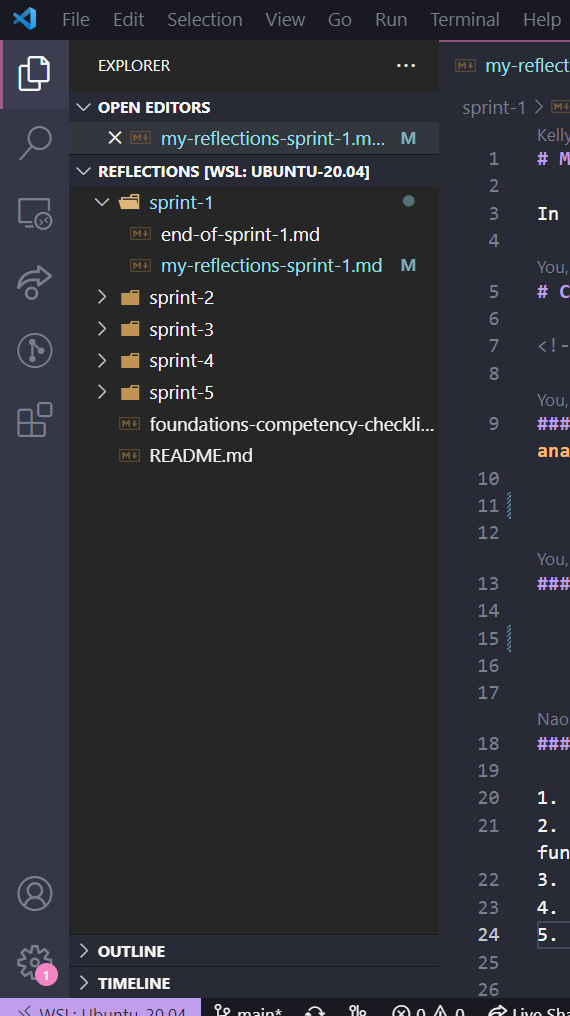
Figure 5: Local cloned repo viewed in text editor
Step 4: Add your (previous) Reflections
The repo you cloned has a folder for each of the sprints you will do, a my-reflections markdown (.md) file in each folder, and an end-of-sprint file that contains the checklist and final reflections you will do once the sprint is completed.
You'll add your reflections to these files on your local version of repo and push them back up to your forked version on GitHub.
Have a look around the files in the sprint-1 folder. Please add your own files if you would like to hold any other reflections or noticings in this repo.
Pro-tip: Use the command line to navigate, open applications and open files.
Open the reflections repo in VS Code (hint:
code .).Copy and paste your previous reflections into the file. Use markdown to make the question format 'bold' or into headers.
Stage your file.
Reflect
Open my-reflections-sprint-1.md in VS Code and add your reflections from this challenge. The questions are under the GitHub Fork & Clone heading in that file.
Stage, commit and push to your GitHub reflections repo (i.e. https://github.com/your-username/reflections).